This communication method is only available when the target for the mappings is a SQL database, i.e. the output information is to be sent to a SQL database
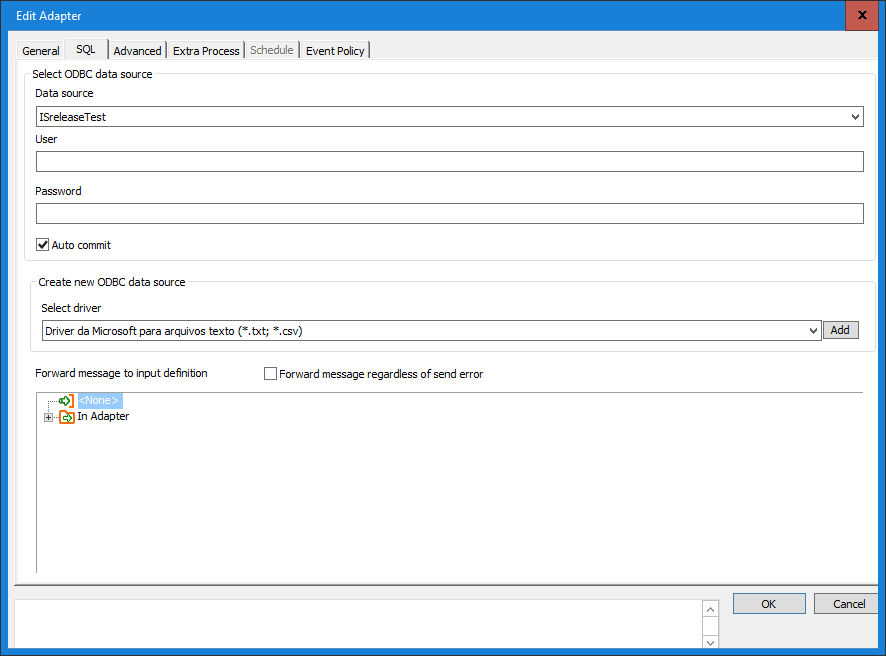
Select Data Source
Select, in the drop down menu Data source to where you want the integration to send the data. This is selected from a list of all the local ODBC sources. If there is not already an appropriate data source, you can create a new one using the command: Create New Data Source. To create a new ODBC source, from the drop down list select the type of database to which you want to connect. Then click Add to create the new ODBC source. When you do this, a dialog box appears (different dialogs, depending on the type of database selected from the list) in which you set up the new data source.
User & Password
Enter the user name for the ODBC source that you have chosen (see above), and the password for this data source. (e.g., “sa” is often used as a default value).
Auto Commit
If you leave this box unchecked, the mapping will use the SQL option NOAUTOCOMMIT. This means the programmer has to issue explicitly a COMMIT SQL statement, after an INSERT or an UPDATE, as required. In other words, the mapping will not approve the executed statements until all the defined statements are approved, committing them as a group. If you check this box, the AUTOCOMMIT mode is selected, and the database system executes a COMMIT after each SQL statement. For further information, see the EDI-C programming language help, SQL statements, Transaction handling.
Create new ODBC data source
If an appropriate data source does not exist, then create a new one. To create a new ODBC source, select the type of database you want to connect to from the drop down list. Then click Add to create the new ODBC data source. When you do this, a dialog box opens (different dialog boxes depending on the type of database you selected from the list) in which you set up the new data source that you want.
0 Comments